

There’s something about December that makes you crave food that feels like a warm hug. And if you grew up in a Punjabi household—or even if you just love good food—you know exactly what that means: Sarson Ka Saag and Makki Ki Roti, preferably with a generous dollop of white butter melting on top.
This isn’t just dinner. It’s the taste of winter afternoons at your nani’s house, of standing in the kitchen watching your mom knead that stubborn makki flour, of the entire house filling with the earthy smell of mustard greens simmering away. It’s the kind of dish that demands you slow down, sit together, and eat with your hands because anything else would be disrespectful to the food.
Quick Summary:
Sarson Ka Saag and Makki Ki Roti is Punjab’s iconic winter dish combining creamy mustard greens curry with cornmeal flatbread. This complete guide includes authentic recipes, cultural history, cooking tips, and everything you need to recreate this warming comfort food at home. Perfect for cold winter evenings when you’re craving something rich, nourishing, and deeply satisfying.
In this Article
What Makes Sarson Ka Saag and Makki Ki Roti Special?
Here’s what’s fascinating: this dish that we consider the very soul of Punjabi cuisine actually has ingredients that aren’t native to India at all. Maize—the star of makki ki roti—arrived from Europe only about 400 years ago. But Punjabis, with their genius for making the most of what the land gives them, turned this imported grain into something so quintessentially Punjabi that nobody questions its heritage anymore.
The real story, though, is even more poignant. During Partition, when families were crossing borders with nothing but what they could carry, migrants would cook simple meals on the streets—maize bread with whatever greens they could find. Mustard grew abundantly in Punjab’s winter fields, and together with makki, it became survival food. Then, slowly, lovingly, it became celebration food. That’s the thing about immigrant and migrant communities everywhere: we take what sustains us and transform it into what defines us.
Understanding Sarson Ka Saag: More Than Just Greens
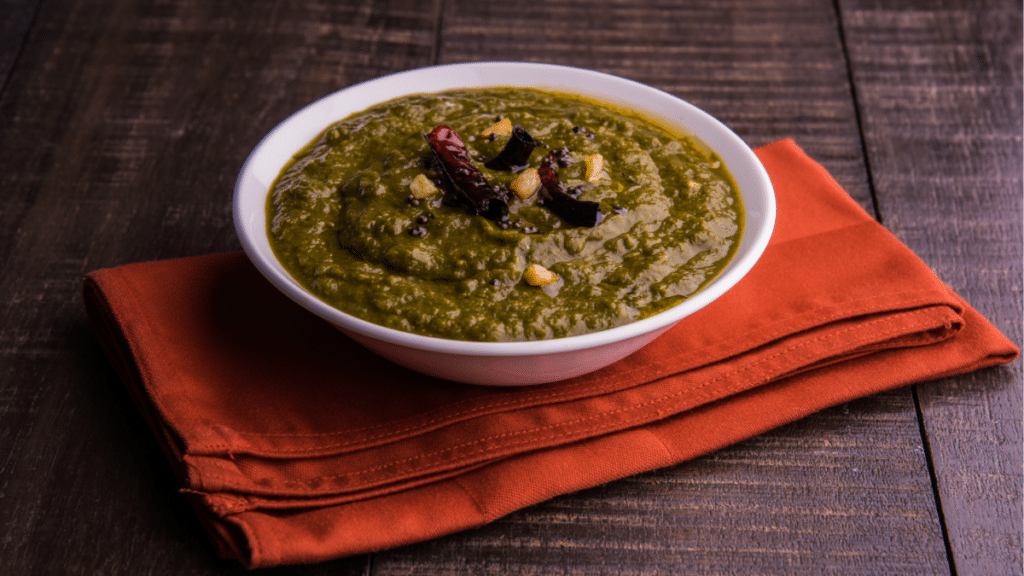
Sarson ka saag isn’t a salad or a simple side dish. It’s a slow-cooked, richly spiced curry made primarily from mustard greens, often mixed with spinach to balance the slight bitterness. The magic happens when you cook it low and slow, letting the greens break down completely, then finish it with a tadka that makes your neighbors wonder what smells so good.
The traditional way involves cooking it for hours until it reaches that thick, almost creamy consistency. Your arm gets tired from stirring, your eyes water from chopping the greens, and you wonder why you didn’t just order takeout. But then you taste it, and you remember why some things are worth the effort.
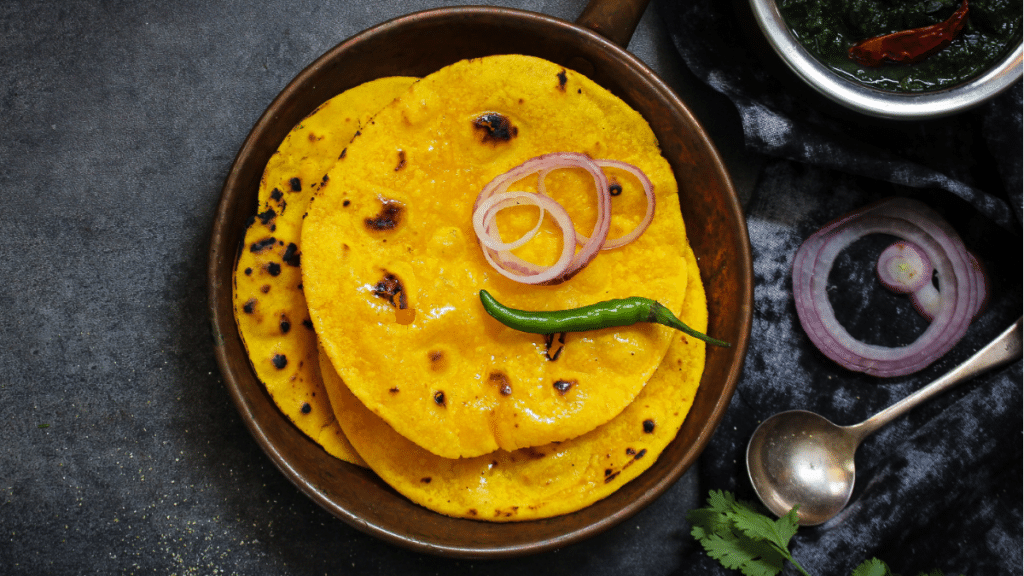
The Art of Making Makki Ki Roti (Without Tears)
Let’s be honest: makki ki roti has made grown adults cry. Not from emotional overwhelm—though that comes later when you taste it—but from sheer frustration. Cornmeal doesn’t have gluten, which means it doesn’t hold together like wheat flour. It cracks, it crumbles, and it laughs at your attempts to roll it thin.
Every Punjabi family has their secret trick. Some add a bit of wheat flour (which purists will judge you for, but who cares if it works?). Others use hot water instead of cold. Many just press the dough between their palms instead of rolling it, creating thick, rustic rotis that are actually more traditional anyway.
The Complete Recipe: Sarson Ka Saag
Ingredients for Sarson Ka Saag
- 750 gm mature mustard green leaves (sarson)
- 250 gm spinach leaves (palak)
- 1/3 cup corn flour (makki ka atta)
- 2 tablespoons unsalted butter or ghee
- 10 gm ginger, finely grated
- 2 onions, finely chopped
- 1 tomato, finely chopped
- 4-5 green chillies, slit lengthwise
- Salt to taste
- Extra butter for serving (don’t be shy)
How to Make Sarson Ka Saag (Step-by-Step)
Step 1: Prep Your Greens Wash the mustard greens and spinach thoroughly—they hold onto dirt like nobody’s business. Keep the tender stems; they add texture. Chop everything finely. Your cutting board will be piled high with greens that look like they could feed an army, but don’t worry, they’ll cook down dramatically.
Step 2: Cook the Greens Add your greens to a pressure cooker with just a little water—about half a cup. The greens release their own moisture as they cook. Pressure cook for 3-4 whistles or until completely soft and tender. If you don’t have a pressure cooker, cover and simmer in a heavy-bottomed pot for about 45 minutes, stirring occasionally. The greens should be so soft they practically melt.
Step 3: Blend to Perfection Once cooled slightly, blend the greens to a coarse or fine puree, depending on your preference. Some families like it chunky, others like it smooth. There’s no wrong answer—only family traditions and personal preferences, which in Indian cooking, amounts to the same thing.
Step 4: Add the Corn Flour Transfer the pureed greens to a heavy-bottomed pan. Heat some ghee in it, add the green puree, and let it cook on medium heat. Now add the corn flour, stirring constantly to avoid lumps. Keep stirring until the mixture thickens to a creamy, luscious consistency. This takes about 10-15 minutes. Your arm will get tired. Consider it a free workout.
Step 5: Make the Tadka In a separate pan, heat 2 tablespoons of ghee. Add the chopped onions and grated ginger, cooking until the onions turn translucent and soft. Add the chopped tomatoes and cook until they break down and become mushy. Toss in the slit green chillies. The kitchen should smell absolutely incredible by now.
Step 6: Bring It Together Pour this aromatic tadka into your simmering saag. Mix everything well, letting all those flavors get to know each other. Let it simmer for another 10-15 minutes on low heat. The saag should be thick enough that when you drag a spoon through it, it leaves a trail. Add salt to taste—remember, you’ll be eating this with makki ki roti, which has its own flavor.
Step 7: The Final Touch Just before serving, drizzle a generous amount of butter or ghee on top. This isn’t optional. The butter melting into the saag is half the experience.
The Complete Recipe: Makki Ki Roti
Ingredients for Makki Ki Roti
- 3 cups maize flour (makki ka atta)
- 1 cup grated radish (mooli) – adds moisture and binding
- Hot water as needed
- Ghee or white butter for cooking
- Salt (optional)
How to Make Makki Ki Roti (Step-by-Step)
Step 1: Prepare the Dough Take the maize flour in a large bowl. Here’s the crucial part: add hot water slowly, mixing as you go. The heat helps the flour bind better. Add the grated radish—this is a grandmother’s trick that adds moisture and makes the dough easier to work with. Some people also add a tiny bit of wheat flour here, maybe 2-3 tablespoons, just to help with binding. Knead until you have a soft, pliable dough. If it’s too dry, it’ll crack when you try to shape it. If it’s too wet, it’ll stick to everything including your fingers, the counter, and your last nerve.
Step 2: Rest the Dough Cover the dough and let it rest for 15-20 minutes. This gives the flour time to absorb the water properly. Use this time to get your saag ready or just sit down for a minute—you’ve earned it.
Step 3: Shape the Rotis Divide the dough into golf-ball-sized portions. Now comes the moment of truth. You can try rolling them with a rolling pin if you’re feeling ambitious, dusting with extra makki flour to prevent sticking. But honestly? The traditional method is to press the dough between your palms or on a piece of plastic wrap or parchment paper, patting it gently into a thick disc about 1/4 inch thick and 5-6 inches in diameter. Thick is fine—this isn’t wheat flour. Thick makki rotis are actually more authentic and taste better anyway.
Step 4: Cook on the Tawa Heat your tawa or griddle until it’s nice and hot. Place your roti on it carefully—this is where they sometimes break, and if they do, just patch them up and carry on. Nobody’s judging. Drizzle some ghee or spread white butter around the edges. Cook for about 2 minutes on each side, pressing gently with a spatula, until you see golden brown spots and the roti is cooked through.
Step 5: The Butter Finish Remove from heat and immediately apply a generous dollop of white butter on top. Let it melt and seep into the roti. This is not the time for dietary concerns. This is the time for joy.
Pro Tips for Success
For the Saag:
- Don’t skip the corn flour—it’s what gives saag its signature creamy texture
- If your saag is too thick, add a little water or milk to adjust consistency
- Make extra! It tastes even better the next day
- Some families add a pinch of jaggery to balance the slight bitterness
For the Roti:
- Keep a bowl of cold water nearby to dip your hands in—helps prevent sticking
- Press, don’t roll, if you’re struggling
- Make them thicker rather than thinner—they’re less likely to break
- Cook on medium-high heat, not low heat, or they’ll become hard
What to Serve with Sarson Ka Saag and Makki Ki Roti
Traditionally, you serve this with sliced onions, green chillies, and white radish on the side. A tall glass of lassi or buttermilk (chaas) is perfect with it—something cool to balance the richness. And if you really want to go all out, some gur (jaggery) for dessert is the classic finish.
Some families also serve it with kadhi or raita, though purists might argue this is unnecessary. But then again, when did Indian families ever fully agree on the “right” way to eat anything?
Why This Dish Matters
You can find Sarson Ka Saag and Makki Ki Roti in fancy restaurants now, on Pinterest boards, in fusion menus where they make makki tacos or saag pizza. And that’s fine—food evolves, travels, adapts. But there’s something about making it at home, with your hands getting tired from kneading and your kitchen smelling like your childhood, that can’t be replicated anywhere else.
It’s winter food, yes, but it’s also resilience food. It’s the taste of a community that took what the land gave them and what history threw at them, and made something beautiful. Every time you make this, you’re participating in that tradition—connecting with something bigger than just dinner.
Can I make Sarson Ka Saag without a pressure cooker?
Yes, cook the greens covered in a heavy pot on low heat for 45–50 minutes until soft.
Why does Makki Ki Roti break while cooking?
Makki flour has no gluten. Use hot water, keep the dough moist, and make thicker rotis.
Can I use frozen mustard greens for saag?
Yes, frozen sarson works well—just reduce the cooking time slightly.
Is Sarson Ka Saag spicy?
Not necessarily. The spice level depends on how many green chillies you add.
How long does Sarson Ka Saag last in the fridge?
It stays fresh for 3–4 days in an airtight container and often tastes better the next day.
Winter meals aren’t just about staying warm—they’re about feeding something deeper, that part of us that remembers where we came from and holds onto it even as we build new lives in new places. Sarson Ka Saag and Makki Ki Roti does exactly that: it grounds you, fills you up, and reminds you that some traditions are worth the sore arms and the tears from chopping green chillies. Make it this weekend. Your kitchen will smell like home, no matter where home used to be.